
As you probably know, SQL is one of the foundations of a successful Citrix deployment. All transactions processed in a XenApp/XenDesktop environment must go through SQL (Citrix brought back connection leasing in 7.6 to temporarily workaround a SQL outage). SQL mirroring is Citrix’s recommended method of a highly available deployment. It also seems to be the cheapest and easiest to deploy. SQL mirroring must be application-aware, meaning that it doesn’t use any sort of VIP to trick the application into thinking that either SQL server can represent the same instance. Citrix will actually know and auto-detect that another database on another server will be used as a failover during the site creation.
I will start off by saying that I am no SQL guru; I know a few basic queries, join concepts, etc. Many Citrix admins aren’t SQL experts either, so we typically leave any sort of SQL-related stuff to the database guys. Well, I went ahead and gave SQL mirroring a shot myself in a recent deployment, and I was actually surprised by how easy it was! I must stress that setting it up the first time during the initial deployment looks way easier than re-configuring after the site has been deployed/pushed to production. So, I recommend doing it right the first time, as going back and re-configuring will introduce downtime to the environment.
So, let’s start with a brand new deployment – before you even touch the Citrix layer, SQL must be taken care of first. This is done with SQL 2014 on Server 2012R2. You will need 2 servers running SQL standard and 1 server with SQL Express acting as the witness. The witness can typically be installed on a multi-role server, such as a delivery controller, to save resources if needed. Since this is a standalone SQL environment just for the Citrix servers, we will keep the name at the default instance.
Start off by installing SQL Standard on both servers. You will need the database engine, client/server components, and COMPLETE management tools. I realized afterward that the install of basic management tools will not include the mirroring options/tools within Mgmt Studio. After that is complete, install SQL Express on your witness.
We will call the principal (primary) database server SQL1, mirror will be SQL2, and witness will be SQL3.
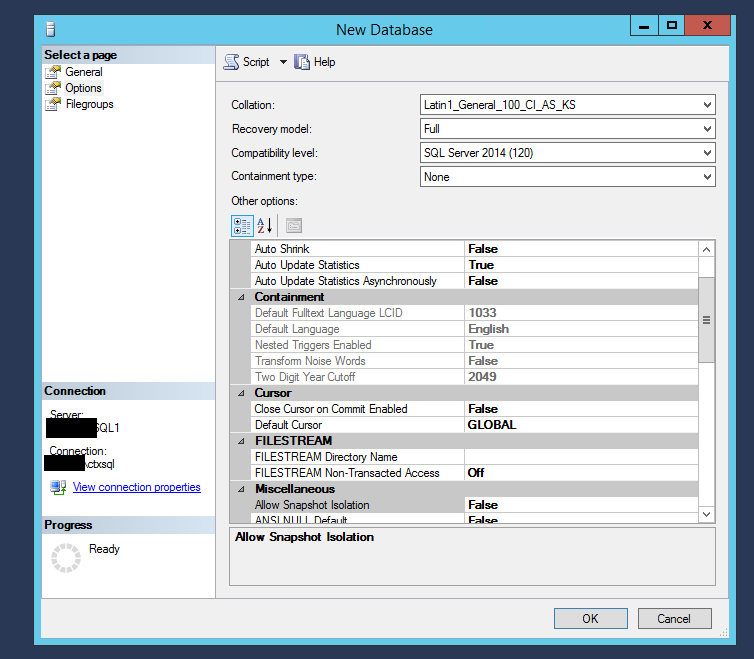
Let’s start by creating a SQL database on SQL1 with the full recovery model. Make sure that the Collation is set to Latin1_General_100_CI_AS_KS in order for Citrix to properly interact with it.
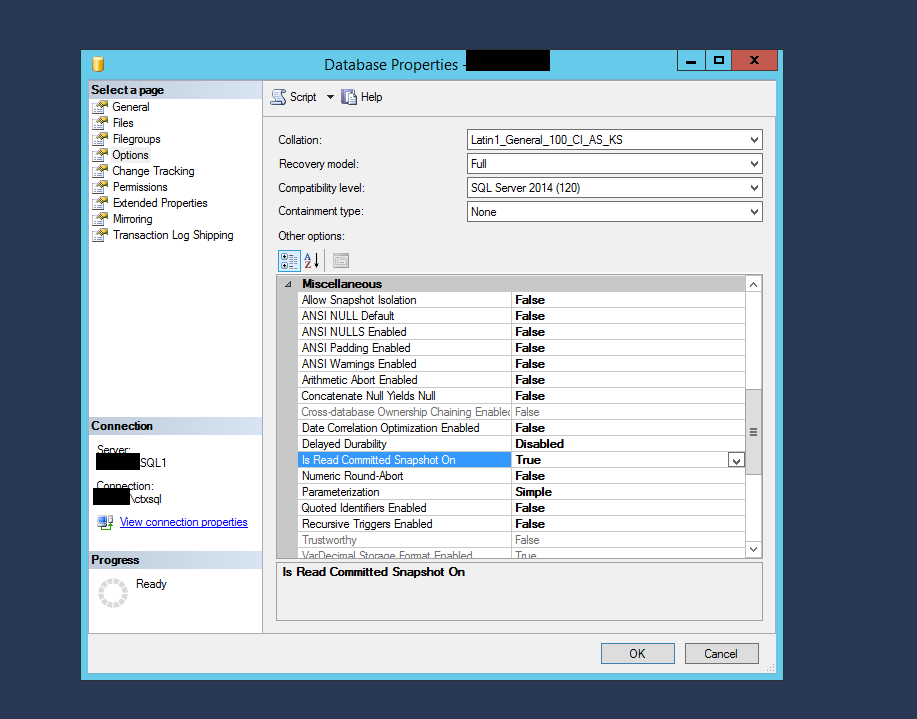
Set Is Read Committed Snapshot On to True after the database is created. This will improve performance and you will not get a warning when the site database is setup. See here for Citrix article on this.
Do a full backup of SQL1 by right-clicking the database and go to backup. Make note of the location.
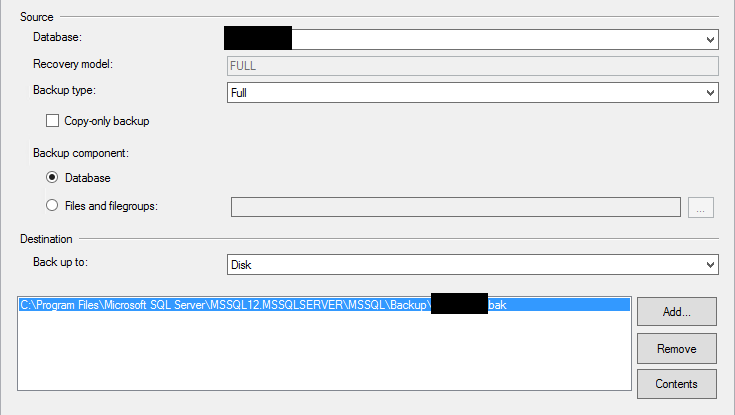
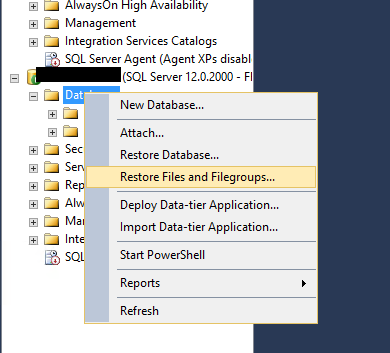
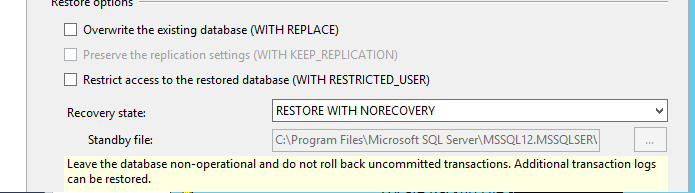
Copy the .bak to the same location on SQL2. Open up management tools on SQL2 go to the Databases folder (you should not have any databases on SQL2 yet!) and go to Restore Database…
Under the Restore Database options, make sure that RESTORE WITH NORECOVERY is selected in the recovery state. This is a very important step that is often overlooked, and will result in an error when attempting to initiate the mirror.
Okay – that essentially sums up the preparation process for the mirror, so we’re about halfway there! Now it’s time to actually initiate it. On SQL1, right-click the database and go to Tasks > Mirror. This will take you to the Mirror properties of the database.
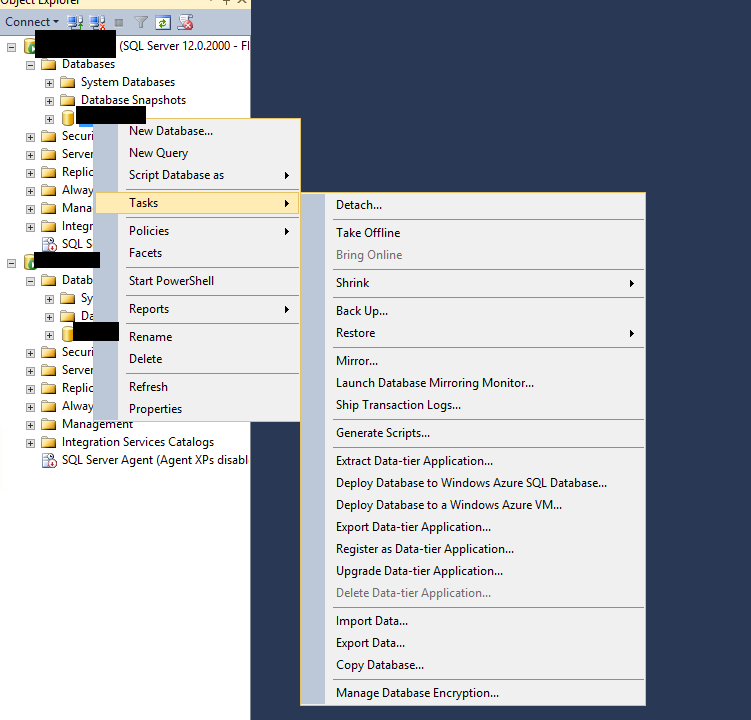
** If the mirror properties do not show up, that usually means that you have not installed the complete set of management tools; only the basic. Go back and edit the existing SQL instance, just adding the complete management tools.
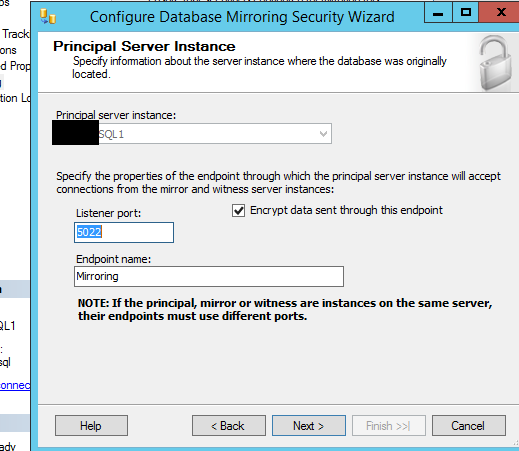
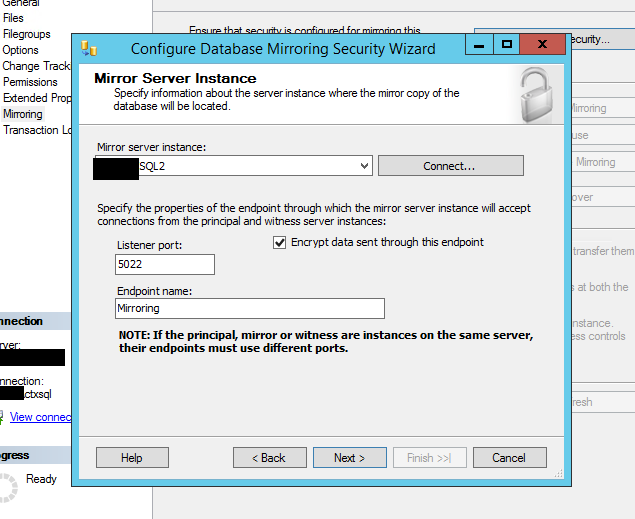
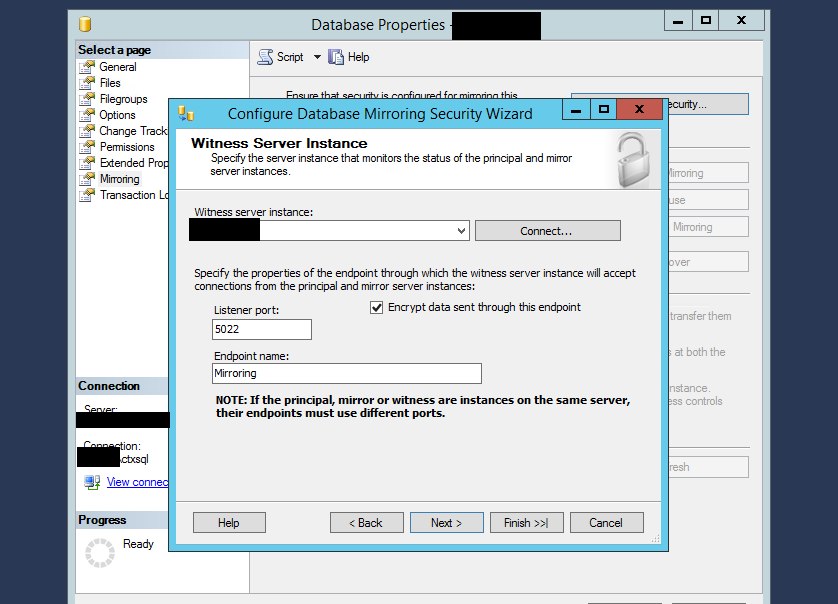
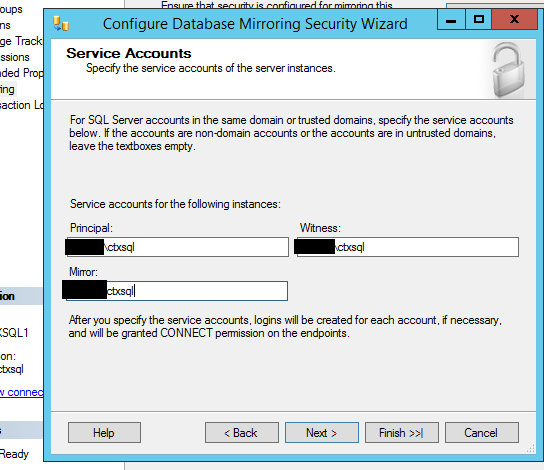
Before we start the mirror, we have to configure the security settings for it. Go ahead and click that so the security wizard comes up. Mirroring defaults to TCP 5022, so ensure that appropriate firewall rules allow this connection (including your witness instance!), on top of your basic SQL ports.
You should breeze through this wizard, ensuring that you specify the correct SQL server instances.

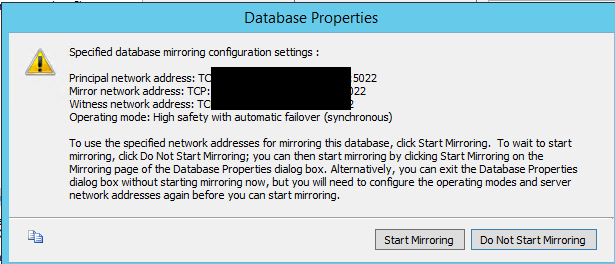
You will be prompted with a pop-up menu after the security wizard. Go ahead and click Start Mirroring to initiate the process:
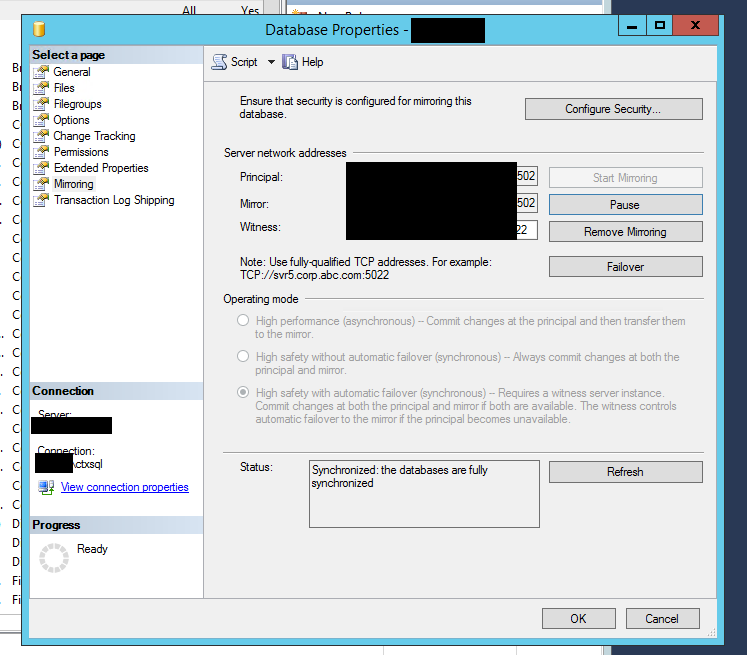
Bam! You have just successfully setup a SQL mirrored instance. You will notice that the mirror properties will show the state of the mirror instance, so this status page is usually a good place to start when troubleshooting issues.
If you happen to run into an error during the initialization, particularly a 1418 error, follow this blog for some good pointers.
All righty – go ahead and start your new site setup. When asking for the instance / database in Studio, make sure and point to SQL1 (principal) for your databases. It will automatically configure your connection strings to use SQL2 as the failover. Please note that we used a single database for the site, logging, and monitoring. It’s usually best practice to have these in 3 separate databases, so you will need to configure the mirroring for each database using the above steps.
When completing backups, log round-ups, etc., make sure and use your principal for the backup source. Do not backup the mirror.
Thanks for reading – I hope this helps!