
The other day I made a change to the “master” machine that was initially used for the deployment of several MCS static/dedicated desktops. When I went to deploy additional desktops, I expected the changes to persist from the master. Guess what? That was not the case. But WHY?
If you pay close attention when you initially deploy the image, you will notice that MCS will do a full VMDK copy of your snapshot chain into a folder of every datastore that is defined in your hosted XenDesktop environment. This makes desktop creations extremely quick when scaling out additional VMs because it 1) negates the need to potentially copy VMDKs across datastores during desktop creation and 2) negates the need to consolidate snapshots during creation. The folder will typicially be the machine catalog name + basedisk + random datastore identifier assigned by XenDesktop. This applies to all MCS images; static and pooled.
![]()
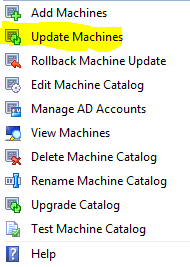
We obviously want to keep the master of dedicated machines up-to-date to avoid unnecessary SCCM pushes, Windows updates, missed software, etc. when we deploy new desktops. Unfortunately Citrix does not give a GUI option for this, like we get on our pooled desktops in Studio:
So, what is almost always the method of action when no GUI option is available? That’s right – PowerShell!
There are two main things to consider here: the “Provisioning Scheme” and the new “Master Image.” The provisioning scheme name almost always matches the machine catalog name. It keeps track of the master image location and some other metadata. The master image is just the snapshot of your master machine that MCS does that full VMDK copy to each datastore that we talked about earlier.
Let’s get right to it. First, open PowerShell on your DDC, and get the provisioning scheme name and the current snapshot that is being used for the master:
add-pssnapin *citrix*
Get-ProvScheme
This will return two very important things for each MCS machine catalog: 1) the ProvisioningSchemeName and 2) the MasterImageVM. You will notice that this contains the name of the snapshot that mirrors the name you provided in vSphere, followed by .snapshot. This makes it easy to locate! Let’s assume our current snapshot is named “v1” and our master is named “XDMaster1.” So the MasterImageVM should look like:
XDHyp:\HostingUnits\<Cluster Name>\XDMaster1.vm\v1.snapshot
Note: If your VM is in a resource pool, this path will also contain that as a “directory.”
We will create a snapshot named “v2” on the master and make some changes, updates, etc. and shutdown the master. Let’s verify that XenDesktop now sees this snapshot in our hypervisor environment:
get-childitem -path “XDHyp:\HostingUnits\<Cluster Name>\XDMaster1.vm\v1.snapshot”
You will see that v2.snapshot is now a child item of your v1.snapshot! Good deal! So how do we point MCS to this snapshot? Simple:
First, let’s make it easy on ourselves and create a couple of variables. The two important ones that I touched on earlier: ProvisioningSchemeName and MasterImageVM:
$ProvScheme = “Windows 10 Static”
“Windows 10 Static” will be the ProvisioningSchemeName from earlier, or usually the name of your Machine Catalog.
$NewMasterImage = “XDHyp:\HostingUnits\<Cluster Name>\XDMaster1.vm\v1.snapshot\v2.snapshot”
That will be the full path to your new snapshot. Remember to use get-childitem to ensure that the DDC sees your new snapshot.
Now, we will use the Publish-ProvMasterVMImage cmdlet to wrap it all up!
Publish-ProvMasterVMImage -ProvisioningSchemeName $ProvScheme -MasterImageVM $NewMasterImage
After running this command, pay attention to your vSphere tasks. You will see a temporary VM get copied, VMDKs get copied to the various datastores, and you should finally get a response from PowerShell that states 100% completion and where the new master image location points.
If you see the dreadful red text, pay attention and make sure you got your paths correct. It is easy to mistype the XDHyp path, forget quotes, etc.
I hope this post thoroughly covers how to update your master image on a static/dedicated Machine Catalog delivered via MCS! Thank you, PowerShell!